Thursday, December 19, 2019

Mail Server on Cent os7

Install ‘iRedMail’ (Fully Featured Mail Server) with Virtual Domains, Webmail, SpamAssassin & ClamAV in Linux.


After HTTP and shadow DNS services, mail (SMTP, POP, IMAP and all related encrypted mail protocols) is one of the most used service in Internet, and also, one of the most sensible, due to spam and open-relay mail servers.

This tutorial will guide you through installing a full mail server with MTA, MDA and MUA software in a few minutes on RHELCentOSScientific Linux  with Postfix, Virtual Domains and Users with MySQL, Dovecot – support for POP3/POP3S, IMAP/IMAPS, Roundcube – Webmail and also, mail spam and virus scanning with SpamAssassin and ClamAV, all installed using a single software package called ‘iRedMail’.

About iRedMail


iRedMail is an Open Source full featured mail server solution that can spare a lot of time for system administrators for complex configurations, has support for all major Linux distributions and ships with the following Linux packages.
  1. Postfix: SMTP service – default MTA.
  2. Dovecot: POP3/POP3S, IMAP/IMAPS, Managesieve service – default MDA.
  3. Apache: Web server.
  4. MySQL/PostgreSQL: Storing application data and/or mail accounts.
  5. OpenLDAP: Storing mail accounts.
  6. Policyd: Postfix policy server.
  7. Amavisd: An interface between Postfix and SpamAssassin, ClamAV. Used for spam and virus scanning.
  8. Roundcube: Webmail – default MUA.
  9. Awstats: Apache and Postfix log analyzer.
  10. Fail2ban: scans log files (e.g. /var/log/maillog) and bans IPs that show malicious system attempts.
Required For Mail Server.

1. Public Ip Address
2. Cent os 7 with 2ghz cpu, 2gb RAM
3. Domain

Contents.

Step 1: Initial Configurations and Static IP Address

Step 2: Install iRedMail

Step 3: Initial Webmail Configurations.

Step 4: Installing SpamAssassin Configurations.


Step 1: Initial Configurations and Static IP Address.


1. After first reboot login with your root account and make sure your system is up to date and install some useful packages needed for later usage.
On RHEL/CentOS/Scientific Linux
#yum update && yum upgrade 
# yum install nano wget bzip2
2. Because this box acts like a Mail Server, a static IP needs to be configured on Network Interface. To add a static IP open and edit your NIC configurations file located on /etc/sysconfig/network-scripts/ path and add the following values.
On RHEL/CentOS/Scientific Linux

 # nano /etc/sysconfig/network-scripts/ifcfg-eth0
Use this file as a template and replace it with your customize values.
DEVICE="eth0"
BOOTPROTO="static"
HWADDR="00:0C:29:01:99:E8"
NM_CONTROLLED="yes"
ONBOOT="yes"
TYPE="Ethernet"
UUID="7345dd1d-f280-4b9b-a760-50208c3ef558"
NAME="eth0"
IPADDR=192.168.1.40
NETMASK=255.255.255.0
GATEWAY=192.168.1.1
DNS1=192.168.1.1
DNS2=8.8.8.8

After you finish editing your NIC file, open network file from the same location as above and add your server unqualified hostname on HOSTNAME directive.
# nano /etc/sysconfig/network-scripts/network


4. After all the configurations above had been written to their corresponding files restart your network service to apply newly configurations and verify it using ping and ifconfig commands.

# service network restart
5. Now that your static network is fully operational, edit /etc/hosts file and add your unqualified and FQDN hostname like the example below.

# nano /etc/hosts
127.0.0.1   centos.mydomain.lan centos localhost localhost.localdomain
192.168.1.40 centos.mydomain.lan centos

# nano /etc/hostname

centos
Replace your mail domain .

6. Another useful package is bash-completion (auto-complete commands sequence using [Tab] key) which is provided by EPEL repository under RedHat based systems and then update your sources.

# rpm –Uvh http://fedora.mirrors.romtelecom.ro/pub/epel/6/i386/epel-release-6-8.noarch.rpm
# yum repolist && yum upgrade
After your sources had been updated install bash-completion utility (answer Yes on all questions).

# yum install bash-completion

Step 2: Install iRedMail

9. In order to downlad iRedMail archive package you must visit it’s official download page section or you can use wget command to download the last version ( 1.0-beta1 at the time of writing this article).

#wget https://bitbucket.org/zhb/iredmail/downloads/iRedMail-1.0-beta1.tar.bz2
10. After iRedMail archive download finishes, extract it using the following command.

# tar xvjf iRedMail-1.0-beta1.tar.bz2
11. Then enter newly extracted iRedMail directory path, mark iRedMail.sh script with executable permissions then run it.

# cd iRedMail-1.0-beta1
# chmod +x iRedMail.sh
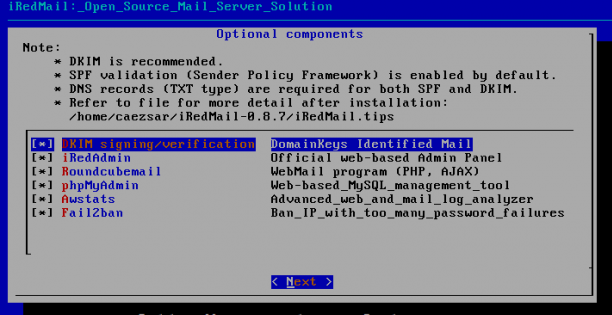
# sudo ./iRedMail.sh
12. After initial system checks the program starts adding required repository then the first guidance prompt asks you whether you wish to continue with installation or abort. Choose Yes to continue.

13. iRedMail uses Maildir format to store e-mails on /var/vmail system path where it creates separated directories for every domain that you append to your MTA server. If you’re comfortable with this path hit Next to move forward with server configurations else provide your desired location then Next.

14. On the next step choose you preferred database to store mail domains names and recipients that will connect to Postfix. This tutorial focuses on MySQL database, so choose MySQL using [Space] bar then continue with Next and provide a strong password for MySQL root account.


15. On the next step add your first virtual domain name. If you own a registered domain name added here (add just the domain name not system FQDN).


16. By default iRedAdmin creates an administrative user with full powers over your server that can be accessed through iRedAdmin panel or through Dovecot protocols (default Roundcube webmail interface or any other IMAP/POP MUA software like SquirrelMail, Rainloop, Microsoft Outlook, Mozilla Thunderbird, Evolution, Mutt, Elm etc ).

Also this postmaster administrative account is used by the system to report incidents related to mail functions or other system failures or useful information – logwatch usually sends its statistics here- so choose a strong password and continue with Next.


17. On the next step choose your other mail server components like iRedAdmin official administrative panel to Postfix, DKIM domain keys – ( adds a signature to message header evaluating message trust for final delivery or further relays), Roundcube default webmail interface ( if you plan to use other Mail Delivery Agent skip Roundcube ), PhpMyadmin (if you are comfortable with MySQL command line you should also skip installing PhpMyAdmin ), Awstats ( useful log statistics and analyzer ), Fail2ban ( protects your server from brute force attacks).
18. On next series of questions, depending on your optional components installed you should answer with Yes. Pay extra attention to iRedMail.tips file located on $HOME extracted directory because it contains sensitive mail server information like usernames and passwords for server applications, server configurations files, default URL and other important information.


19. After installation finishes reboot your system and verify iRedmail.tips file to see your server default settings – you should move That file folder(/root/iredadmin) to a secure system path(/home or any other) with 600 permissions on it.


20. Access default web applications on the following URLs.
  1. Roundcube Webmail – https://domain_name or server_IP/mail/
  2. IRedAdmin panel – https://domain_name or server_IP/iredadmin/


Step 3: Initial Webmail Configurations.

21. iRedAdmin administrative panel offers a basic webmail interface where you can add virtual domains and accounts for your mail server that Postfix can handle through MySQL backend. To login to iRedAdmin panel point your browser to https://domain_name/iredadmin/ or https://server_IP/iredadmin/ URL and use the following default credentials.
  1. Username: postmaster@your_domain_name.tld
  2. Password: postmaster password set on #16 point


22. To add a user navigate to Add -> User then provide your desired username mail address and password. You can also setup the amount of space your user Mailbox can handle with Quota and you can also promote users with administrative powers over iRedAdmin panel by Marking user as Global admin.


Thank u For Reading This Artical. If Any Question Comment Here.


Tuesday, December 10, 2019

Upgrading cent OS 6 To 7

As per the CentOS 7 announcement, it is possible to upgrade the CentOS 6 to CentOS 7 with the help of redhat-upgrade-tool. CentOS has not yet posted any official document on upgrading the CentOS 6, since there is no official documentation; we are not recommending this upgrade on production environment. If you like to give a try on development, you can just follow the simple steps.

[Index]
1.Installing CentOS upgrading tool.
2.Preupgrade Assistance.
3.Perfrom Upgrade.

1. Installing CentOS Upgrading Tool.


redhat-upgrade-tool is not available on standard repositories, you must setup the repository to install it.
# vi /etc/yum.repos.d/upgrade.repo
Copy and Paste Follow To That file. and Then Press ctrl+o then type :wq to Save and exit from file.


[upgrade]
name=upgrade
baseurl=https://buildlogs.centos.org/centos/6/upg/x86_64/
enabled=1
gpgcheck=0
Now Install Following packages.
# yum -y install preupgrade-assistant-contents redhat-upgrade-tool preupgrade-assistant

if Followin error occur Then Do as per Describe Below.

I/O warning : failed to load external entity "/usr/share/openscap/xsl/security-g                uide.xsl"
compilation error: file /usr/share/preupgrade/xsl/preup.xsl line 40 element impo                rt
xsl:import : unable to load /usr/share/openscap/xsl/security-guide.xsl
I/O warning : failed to load external entity "/usr/share/openscap/xsl/oval-repor                t.xsl"
compilation error: file /usr/share/preupgrade/xsl/preup.xsl line 41 element impo                rt
xsl:import : unable to load /usr/share/openscap/xsl/oval-report.xsl
I/O warning : failed to load external entity "/usr/share/openscap/xsl/sce-report                .xsl"
compilation error: file /usr/share/preupgrade/xsl/preup.xsl line 42 element impo                rt
xsl:import : unable to load /usr/share/openscap/xsl/sce-report.xsl
OpenSCAP Error:: Could not parse XSLT file '/usr/share/preupgrade/xsl/preup.xsl'                 [oscapxml.c:416]
Unable to open file /root/preupgrade/result.html
Usage: preupg [options]

preupg: error: [Errno 2] No such file or directory: '/root/preupgrade/result.htm                l'
Step To Resolve.

 yum erase openscap
 yum install https://buildlogs.centos.org/centos/6/upg/x86_64/Packages/openscap-1.0.8-1.0.1.el6.centos.x86_64.rpm
yum install redhat-upgrade-tool preupgrade-assistant-contentsyum install redhat-upgrade-tool preupgrade-assistant-contents

After Successfully installation .Do Following step.


2.Preupgrade Assistance.

Run the following command to check the potential problem you might encounter with an upgrade from CentOS 6 to CentOS 7 before making a changes to the system.
# preupg
Note: Output of preupg command has been shorted to reduce the length of the post.

|System kickstart                                                                                            |notapplicable  |
|YUM                                                                                                         |notapplicable  |
|Check for usage of dangerous range of UID/GIDs                                                              |notapplicable  |
|Incorrect usage of reserved UID/GIDs                                                                        |notapplicable  |
|NIS ypbind config files back-up                                                                             |notapplicable  |
|NIS Makefile back-up                                                                                        |notapplicable  |
|NIS server maps check                                                                                       |notapplicable  |
|NIS server MAXUID and MAXGID limits check                                                                   |notapplicable  |
|NIS server config file back-up                                                                              |notapplicable  |
------------------------------------------------------------------------------------------------------------------------------
Tarball with results is stored here /root/preupgrade-results/preupg_results-140716022514.tar.gz .
The latest assessment is stored in directory /root/preupgrade .
Upload results to UI by command:
e.g. preupg -u http://127.0.0.1:8099/submit/ -r /root/preupgrade-results/preupg_results-*.tar.gz .
From the above you can find what all are the packages and application will be affected by this upgrade, if you are ok with it; you can go ahead for the next step.

After Done.Transfer Report File To html Directory And Check Errors.

cp /root/preupgrade/ /var/www/html/

chmod 0755 /var/www/html/preupgrade/

if All Test will Passed Then You Perform To upgrade Or Error Then See Discription And if No issue with That error Then Do upgrade.otherwise You Have to Changed as per Error.


3.Perform Upgrade.

We are going to use the repo file for the upgrade, issue the following command to import the GPG key.


# rpm --import http://centos.excellmedia.net/7.0.1406/os/x86_64/RPM-GPG-KEY-CentOS-7
As per the man page, the following command is used to upgrade the CentOS 6; this will download the packages from the internet.
# redhat-upgrade-tool --network 7.0 --instrepo http://centos.excellmedia.net/7.0.1406/os/x86_64/
But when i issued the command, it gave me the error to re-run the preupgrade-assistant again. I tried multiple times but no luck.

Sunday, November 17, 2019

How To Configure DNS (BIND) Server on CENTOS

This Artical is based On Cent os 6. So if Your r using Another Plat Form You Have To Find Out Your installation Directory And Some Commands.


This Blog Is For ISP's. To developing DNS.

Undestanding DNS.

The Domain Name System (DNS) is a hierarchical distributed naming system for computers, services, or any resource connected to the Internet or a private network. It associates various information with domain names assigned to each of the participating entities.

Understanding Forward Lookup Zone.

Forward DNS is a type of DNS request in which a domain name is used to obtain its corresponding IP address. A DNS server is said to resolve a domain name when it returns its IP address. A forward DNS request is the opposite of a reverse DNS lookup. Forward DNS is also known as a forward DNS lookup.

Understanding Reverse Lookup Zone.

Reverse DNS is IP address to domain name mapping - the opposite of forward (normal) DNS which maps domain names to IP addresses. ... With forward DNS, you point the zone to your DNS server by registering that domain name with a registrar.

Change Your IP Addresses And Domain name
192.168.1.1 to Your Ip And skynet.com To Your Domain Name.

Contents 


  • 1 BIND Installation

Installing Bind using YUM respositories.

yum install bind bind-utils
2  BIND Configuration

First You Have to Edit the main config file:

vi /etc/named.conf

 2.1 add your DNS Server IP Address to the listen directive:

Adding Your System IP Address After 127.0.0.1; 
Eg. 192.168.1.1 is My System IP.
My ip pool is 192.168.1.0/23
Then Enable quries From All Clients.
Then Create Zone Files.

//
// named.conf
//
// Provided by Red Hat bind package to configure the ISC BIND named(8) DNS
// server as a caching only nameserver (as a localhost DNS resolver only).
//
// See /usr/share/doc/bind*/sample/ for example named configuration files.
//

options {
 listen-on port 53 { 127.0.0.1; 192.168.1.1;};
 listen-on-v6 port 53 { ::1; };
 directory  "/var/named";
 dump-file  "/var/named/data/cache_dump.db";
        statistics-file "/var/named/data/named_stats.txt";
        memstatistics-file "/var/named/data/named_mem_stats.txt";
 allow-query {
  any;
  };
 allow-transfer {
  localhost;
  192.168.1.0/23;
  any;
  };
 recursion yes;

 dnssec-enable yes;
 dnssec-validation yes;

 /* Path to ISC DLV key */
 bindkeys-file "/etc/named.iscdlv.key";

 managed-keys-directory "/var/named/dynamic";
 forwarders {
  8.8.8.8;
  };
};

logging {
        channel default_debug {
                file "data/named.run";
                severity dynamic;
        };
};

zone "." IN {
 type hint;
 file "named.ca";
};

include "/etc/named.rfc1912.zones";
include "/etc/named.root.key";

//Forward lookup zone file
zone "skynet.com" {
 type master;
 file "/var/named/skynet.com.hosts";
 };
//Reverse Lookup zone For ip addresses.
zone "2.168.192.in-addr.arpa" {
 type master;
 file "/var/named/192.168.2.rev";
    allow-transfer{192.168.1.1; };
 };
//Reverse Lookup Zone For Ip addresses.

zone "1.168.192.in-addr.arpa" {
 type master;
 file "/var/named/192.168.1.rev";
    allow-transfer{192.168.1.1; };
 };
Here I will Create 2 Reverse Lookup Zone which is For My IPs.
192.168.1.1/24 & 192.168.2.1/24
So This Both Reverse Zones Belongs To My Forward Zone.

  • 3 Editing Zones config File.

3.1 First We Config Forward Zone skynet.com.host.

Using VI Command   vi /var/named/skynet.com.hosts.

$ttl 38400
skynet.com. IN SOA ns1.skynet.com. admin@skynet.com. (
   2018100227
   10800
   3600
   1209600
   38400 )
skynet.com. IN NS ns1.skynet.com.
skynet.com. IN NS ns2.skynet.com.
ns1.skynet.com. 600  IN A 192.168.1.1
ns2.skynet.com. 1200 IN A 192.168.2.1 #secondary System Ip
skynet.com. IN A 192.168.1.1
www.skynet.com. IN A 192.168.1.1
3.2 Editing Reverse Zone

using vi Command  vi  /var/named/192.168.1.rev.
$ttl 38400
1.168.192.in-addr.arpa. IN SOA skynet.com. admin@skynet.com. (
   1498111012
   10801
   3600
   604800
   38400 )
1.168.192.in-addr.arpa. IN NS ns1.skynet.com.
1.168.192.in-addr.arpa. IN NS ns2.skynet.com.
1 IN PTR node-ns1.skynet.com #Replace Your Reverse Lookup. For IP Address 192.168.1.1
You Can add You all Ip Addresses of 192.168.1.1/24 Ranges For PTR/rdns Lookup.
using Copy and Past Last PTR Record.

Config Secondary Reverse Lookup Zone.

This Reverse Zone is For Your Second Ip Pool.

vi  /var/named/192.168.2.rev.
$ttl 38400
2.168.192.in-addr.arpa. IN SOA skynet.com. admin@skynet.com. (
   1498111012
   10801
   3600
   604800
   38400 )
2.168.192.in-addr.arpa. IN NS ns1.skynet.com.
2.168.192.in-addr.arpa. IN NS ns2.skynet.com.
1 IN PTR node-ns1.skynet.com #Replace Your Reverse Lookup. For IP Address 192.168.2.1
After Creting forward And Reverse Lookup Zones. Check All Config .

4 Test Config Files


named-checkconf
This Command Check All Syntex and revert Back You.

5 BIND start and enable for auto-start on boot

service named start
service named enable

This 2 Command Start service And Auto start on bootup.


:NOTE:

Now You have To Point Your Domain To Your Name Server. 
So If You Purchase Your Domain From godaddy or google or any other Hosting Provider.
You Have To Update Your Nameserver From Provider panel.
Host Provider will update When Your Name server got Reply.
So from Local Network You Have to ping .
Your Name server like My Nameserver is ns1.skynet.com 
So will " ping -t ns1.skynet.com " if reply will come with pointed Ip Address Then Your Hosting Provider will update and will take up to 24hrs.

See Example of Godaddy.
and Also Update 3 Host Name like ns1 ,ns2 ,www .TO Godaddy Panel.
See Example.

After This All Config Done. Then You Will Send Request To Your Ip Provider To Updating rdns Entries.


 Dear all, Kindly Check Out skynetconsult.in For More Blog. Regards, skynetConsultacy.